
Pecking Order
Outliners can help you organize your ideas, images, notes, and more. In this article, we look at two of these tools: Vault 3 and OutWiker.
|

©Johan Swanepoel 123rf.com
Outliners can help you organize your ideas, images, notes, and more. In this article, we look at two of these tools: Vault 3 and OutWiker.
Text editors and note-taking applications are good for writing, but they are not so good at keeping tabs on stuff. For this, you need an outliner, an application designed specifically for organizing pieces of data as a hierarchical tree. An outliner can be particularly useful for structuring your ideas, images, research notes, and pretty much everything in between. Several excellent outliners are available to choose from, including Vault 3 and OutWiker.
Vault 3 [1], which is written in Java, is available on other platforms besides Linux – a boon for users working in mixed environments. Vault 3 requires no installation, but it does require a Java Runtime Environment (JRE). On Ubuntu, you can use the OpenJDK JRE, which can be installed using the sudo apt-get install openjdk-7-jre command. Grab the latest release of Vault 3 from the project's web site and unpack the downloaded archive to your home directory. In the resulting directory, locate the vault_linux_gtk.jar file and make it executable using the chmod +x vault_linux_gtk.jar command. Double-click on the file to launch the application.
Vault 3 features a conventional outliner interface with the main window split into two panes: The left pane is used to manage the hierarchical tree, and the right pane acts as a working area for editing the currently selected entry. The main toolbar at the top provides quick access to all frequently used tools. Before you start using Vault 3, you should configure its basic settings. To do this, choose Options | Settings and switch to the Startup File section. Here, you can specify the file you want the application to open on every launch.
Alternatively, you can configure Vault 3 to open the recently used file, or not open anything at all. In the Saving section, you can enable the auto-save feature and specify the desired interval. If you choose to activate this functionality, you should also enable the feature that creates a backup copy of the file before saving modifications. This gives you a way to revert changes, if needed. By default, Vault 3 uses the system font, but you can change that in the Default Text Font section. Finally, if you want to be able to send email directly from within Vault 3, you should configure email settings in the Email section (Figure 1).
 Figure 1: Configuring Vault 3.
Vault 3 stores all data in a single SQLite database. This approach means that a single file is easy to manage and back up. But, if the database gets corrupted, all your data will be gone. When you launch Vault 3 for the first time, the application creates an empty database, and you can start populating it with data right away. To create a new entry, press the Add button in the main toolbar or use the Alt+Enter keyboard shortcut (Figure 2). Give the new entry a descriptive title and enter optional text. Vault 3 supports two types of entries: text-based entries and entries that contain photos and accompanying text.
 Figure 2: Adding a new entry.
To add a photo to an entry, you can specify the URL of the image published on the web or use the Browse button to pick the photo stored on your machine. Vault 3 allows you to add only one image per entry, though. Instead of using the Add command to create individual photo entries, you can import multiple images as separate entries in one fell swoop by choosing the Outline | Import Photos command. Additionally, you can import all text files and photos stored in a directory on your local machine using the appropriate command under the File | Import menu.
Like any outliner worth its salt, Vault 3 provides commands for moving and indenting entries, as well as expanding and collapsing branches. The Sort command can come in handy for sorting entries by user-defined criteria, and you can use the Cut , Copy , and Paste commands to rearrange the entries. The application also features powerful search functionality tucked under the Search tab of the left window pane. Using the available options, you can easily find entries matching specific search criteria.
To keep sensitive data safe, you can protect the database with a password using the File | Password command (Figure 3). If you specified an email account in the Settings section, you can use Vault 3's email functionality to send any entry in the database directly from within the application. To do this, select the desired entry and choose File | Send Email (Figure 4). This opens the Send Mail dialog window with the contents of the entry conveniently inserted within the body of the email message. If the entry contains images, you can add them to the message as attachments.
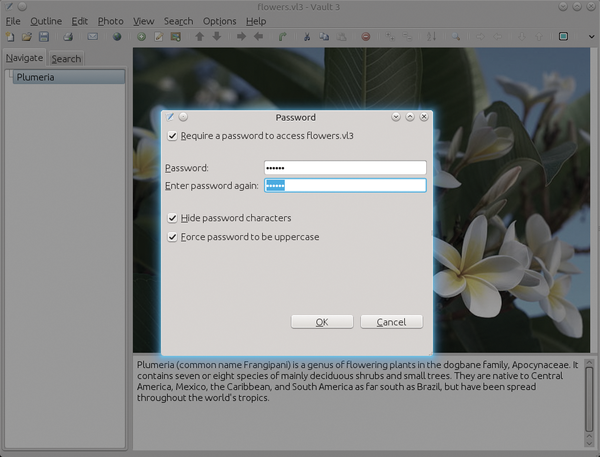 Figure 3: You can protect a Vault 3 database with a password.
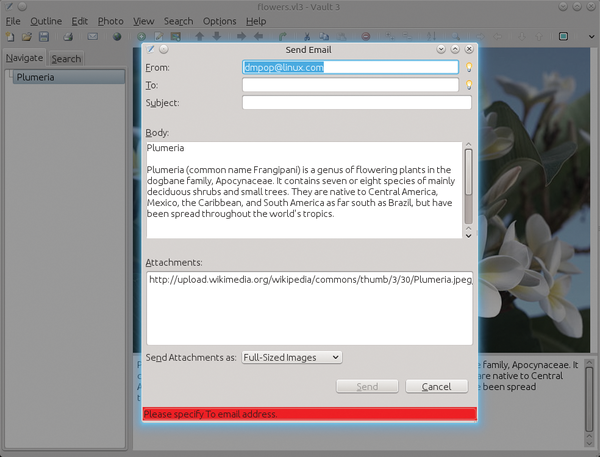 Figure 4: Vault 3 allows you to send email directly from within the application.
If you use an Android device when you are out and about, you'll be pleased to learn that Vault 3 is also available as an Android app [2]. You can use it not only to view and edit existing Vault 3 databases but also to create new ones.
Vault 3 does have a few limitations. Notably, the application lacks text-formatting functionality and does not allow you to insert multiple images in a entry. But, if you can live without these features, and you want to be able to work with your data on Android, then Vault 3 could be right up your alley.
Although Vault 3 features all essential tools for working with outlines, this application falls squarely under the "no-frills" category. Thus, advanced users might want to take a closer look at OutWiker [3], a powerful outliner that incorporates wiki-like functionality and offers a wide range of advanced tools.
Like Vault 3, OutWiker is available on Windows and Linux (there is no Android app, though). An Ubuntu version of the application is available through a dedicated PPA, so OutWiker can be installed on any Ubuntu flavor using three simple commands:
sudo apt-add-repository ppa:outwiker-team/ppa
sudo apt-get update
sudo apt-get install outwiker
Once the application is up and running, your first stop should be the Preferences section (choose Edit | Preferences or press Ctrl+F8), where you can configure OutWiker's settings (Figure 5). Here, you can configure the application's default behavior, specify custom fonts, and manage plugins (more about plugins later).
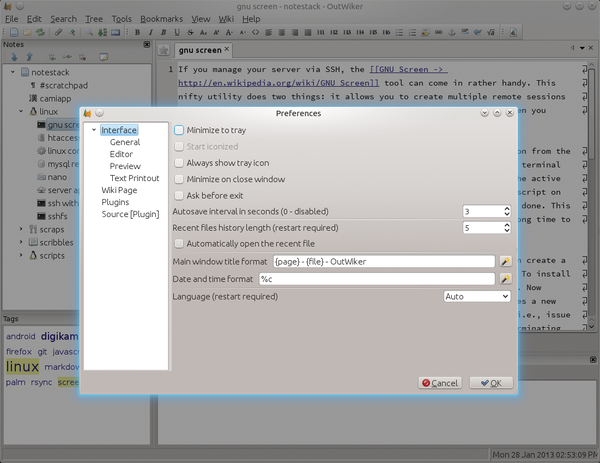 Figure 5: Tweaking OutWiker's preferences.
To accommodate OutWiker's features, the application's main window is divided into multiple panes. OutWiker allows you to assign multiple tags to any wiki pages, so besides the Notes pane displaying the tree structure of the currently opened wiki, there is also the Tags pane that shows a tag cloud. Clicking on a tag displays a pop-up list of matching pages.
Directly under the main working area is the Attachments pane that lists all files attached to the currently viewed page. You can attach practically any type of file to a page by simply dropping the file onto the Attachments pane. Attaching images to the page lets you insert their thumbnails into the text. To do this, press the Thumbnail button in the main toolbar, select the desired image from the File name drop-down list, specify the thumbnail dimensions, and press OK .
Unlike Vault 3, OutWiker supports rich text formatting using the wiki markup, and the main toolbar provides quick access to most formatting options (Figure 6). Although OutWiker doesn't have a WYSIWYG editor, you can use the Preview tab to view the formatted page. Better still, you can quickly switch between the Wiki and Preview tabs using the F4 key. Besides wiki pages, OutWiker also supports HTML and plain text pages. The former can be useful if you prefer to use the HTML markup for formatting text, and the latter can come in handy if you don't need any formatting at all. You can specify the page type when adding a new page. Note, however, that you can't change the type of the existing page.
 Figure 6: OutWiker uses the wiki markup for rich text formatting.
The main working area supports tabs, so you can open multiple pages and quickly switch between them. OutWiker's bookmarking functionality can come in rather handy when working with complex wikis containing dozens or even hundreds of pages. Bookmarking the currently viewed page is as easy as pressing Ctrl+D or clicking the Add to Bookmarks button in the working area.
Besides the usual set of tools for working with outlines, OutWiker packs several interesting features. Similar to using a wiki, you can link pages to each other as well as create anchors inside a page. In addition to a regular search tool, OutWiker sports the global search feature, which lets you perform advanced searches and save them for later use (Figure 7). To create a global search, choose Tools | Global Search . This creates a special search page where you can specify the desired search terms and parameters.
 Figure 7: Using the Global Search feature.
OutWiker stores all contents of the entire wiki in a separate directory, and all pages are saved as plain text files. This means that you can easily move the wiki between different machines, and you can access your data using a regular text editor. If you use file synchronization services like Dropbox, Wuala, or Ubuntu One, you can place your wikis in the synchronized directory and work with them on multiple machines.
Pages: 4
US / Canada
UK / Australia
When you think of CMS and blogs, names such as WordPress, Typo3, and Joomla come up. But often, much leaner solutions will suffice.

GIMP by itself can already do a lot. With plugins, you can extend the free image editor with complex functions, most of which allow you to see the final results before you apply them.

Web page loading time relies on a complex interplay among the web server, the web page, and the web browser. Learning a few tricks can help speed up load times for the pages you create.

Programmers and web designers need to manage a variety of information from one central point. The Leo editor steps up to the challenge in several clever ways.