
Jack of All Trades
Like all work interfaces under Linux, the Gnome desktop offers a variety of smaller programs. One of these gems is the image viewer gThumb.
|

fotana, 123RF.com
Like all work interfaces under Linux, the Gnome desktop offers a variety of smaller programs. One of these gems is the image viewer gThumb.
Image viewers abound under Linux, and some have additional functions that permit universal application beyond the viewer capability. A particularly successful combination is gThumb, which consists of an image viewer together with software that allows the user to perform simple image editing tasks [1].
The gThumb software was developed for the Gnome desktop. For distributions that use Gnome as their interface, therefore, it is usually already installed. However, the software also runs with most other work environments, which at times leads to extensive dependencies.
You can install gThumb on Ubuntu with a simple:
apt-get install gthumb
You can also install the bleeding-edge version using a specific PPA. Executing:
sudo add-apt-repository ppa:webupd8team/gthumb
sudo apt-get update
sudo apt-get install gthumb
will get the job done. Ignore the warnings: The latest version works fine in Unity.
Or, you can use the Ubuntu Software Center. The package manager resolves the dependencies correctly most of the time. Type gthumb in the HUD and the program will pop up.
The program welcomes you with an interface that takes some getting used to. It corresponds to the experimental Gnome conventions introduced in version 3. The current image file appears on the upper left side of the window when the program is in editing mode. Thumbnails for other images appear below in a bar that stretches horizontally across the window. To the upper right, you will see a fold-out sidebar that contains various interfaces arranged horizontally. Some of these branch off into the settings. There is no standard menu bar.
Remember that some operating elements usually provided by the window manager started appearing in Gnome 3 inside the application window once "client-side decorations" were introduced. This means that the buttons for minimizing, maximizing, and closing a window appear twice on interfaces that are not based on GTK. However, none of this has an impact on the functionality (Figure 1).
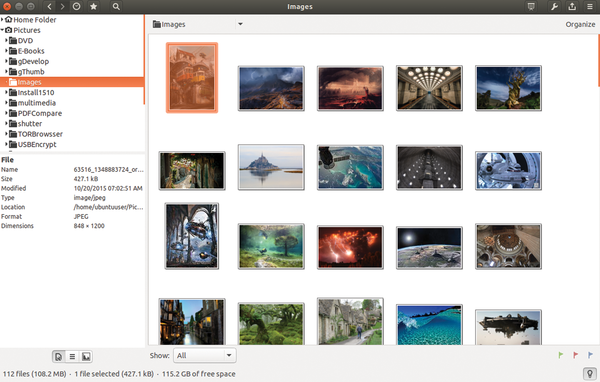 Figure 1: The interface for gThumb takes some getting used to, but it is functional. It also looks clean when the program first starts up.
The individual pictograms on the control buttons are not always readily decipherable by the user. Therefore, the software explains their functions with a tool tip once you hover over the button with the mouse. The buttons to the upper left allow you to change the view of the image and also to rotate it. The buttons at the upper right are used to modify the files.
The button to the far left is properties . Here you will find a listing of the features of the image in the form of a table. The button next to it labeled Edit File branches into the menu for editing. From this menu, you can choose from among seven functions from the colors group. Additionally, it is possible to go back and sharpen the contents later.
The first function in this group is especially interesting. It is called automatic contrast equalization . I used this function during testing to edit landscape images that appeared faded due to strong sunshine or fog. I was able to improve the contrast and saturation considerably without decreasing brightness (Figure 2).
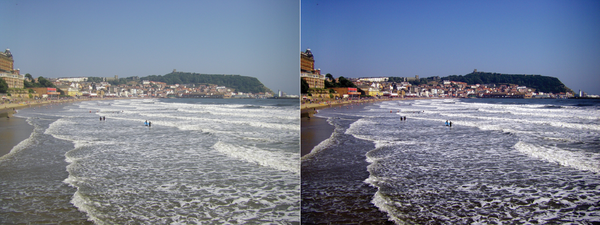 Figure 2: If done correctly, changing contrast improves an image structure greatly without making the image darker.
With the next button over to the right, you can perform a complete color equalization. A slider lets you manually set brightness, contrast, concentration, and Gamma value. You can also adapt the number of colors; however, this is preset to the additive color model [2].
The third button lets you bring the image into sharper focus. Just as with the image editor Gimp, the gThumb software superimposes a small excerpt of the image as a preview. This lets you see whether artifacts are visible due to overly restrictive settings before starting the editing process for the entire image.
A mouse click on the button sitting to the right in colors lets you adjust the histogram. This also has a significant effect on the image in that the software seeks the best possible distribution for brightness across the entire image.
The second row of control buttons in colors let you convert a color image according to gray shades, to invert it, and to correct the red eye effect often seen in photographs taken with a flash of people or animals.
Because the software immediately implements all modifications, you will be able to determine whether the option you have selected actually does what you want. If not, you can reverse the last operation by clicking on the revert button at the upper right of the program window.
The button group labeled rotation exists so the gThumb user has various options for rotating and flipping an image. This functionality is especially important when working with photographs taken with a digital camera in portrait format. The photos will need to be rotated 90 degrees for viewing in landscape format.
The Format group offers functions for cropping an image and modifying its size. In addition to a simple feature for cropping images, gThumb has an option for adapting an image to a standard format.
For example, this option lets you use a mouse click to change the dimensions of an image to the standard 3:2 size so that you can use the image as a postcard. The software overlays a grid onto the image so you can determine the section you want using the mouse.
Pages: 4
US / Canada
UK / Australia

If the default Ubuntu image viewer doesn't cut it for you, there are plenty of other excellent image viewing applications you can choose from.
The Linux Mint team announces its cool new version 11, aka "Katya."