Listen to Me
The Blather, FreeSpeech, Palaver, Simon, and Vedics speech recognition programs are ready to respond to voice commands. This sounds good in theory, but there are some pitfalls in practice.

© nem youth - freeimages.com
The Blather, FreeSpeech, Palaver, Simon, and Vedics speech recognition programs are ready to respond to voice commands. This sounds good in theory, but there are some pitfalls in practice.
A strong "Start browser!" belted into the microphone will start Firefox – at least, that's what the five leading free speech recognition programs (Blather, FreeSpeech, Palaver, Simon, and Vedics) promise. With that, they want to make input easier and also help disabled individuals better operate the desktop.
Four of these vendors – Vedics being the exception – allow you to decide for yourself what command triggers an action. A "Start browser!" could conceivably be used to open a text editor – confusing, yet possible.
The five applications do not analyze speech patterns themselves; they leave that task to other software. As a rule PocketSphinx [1] from Carnegie Mellon University (CMU) is the "other" software used.
The applications generally refer to such analysis assistance as back ends or engines. Blather, FreeSpeech, Palaver, and Vedics are under the GNU GPLv3 license, whereas Simon still uses the older version 2.
Blather [1] is programmed in Python and to get it to work, you must install the PocketSphinx archive in the package manager, along with the Python Gstreamer and Python GTK (in Ubuntu, python-gtk2 , python-gst0.10 , and pocketsphinx ). If PocketSphinx isn't part of your distribution, follow the instructions in the "Three-Step Sphinx" box.
Three-Step Sphinx
To begin, integrate the Bison package and, when appropriate, Perl. From the web [4], download the sphinxbase , pocketsphinx , and sphinxtrain packages. Unzip them and install them using the usual three-step procedure in Listing 1, where you start with the base package.
Listing 1
Installation Steps
$ ./configure
$ make
$ sudo make install
From Gitorious [2], download the current development version of Blather. After unzipping the archive, rename the file commands.tmp in commands and use a text editor to enter the desired English-language commands. Begin each line with an uppercase letter followed by a colon and the executable shell command.
Next, create the ~/.config/blather directory, copy the commands file into it and run ./Blather.py from the Blather directory. When the program seems to crash, end it with Ctrl+C. Then, upload the ~/.config/blather/sentences.corpus file to the Sphinx Knowledge Base Tools website [3].
After clicking Compile Knowledge Base on the website, save the generated file with the .lm extension under the name lm , and the file with the .dic extension under the name dic in the ~/.config/blather/language directory. You can then start Blather in its directory with ./Blather.py -i g .
The program displays a very clear main window (Figure 1). After you click Listen , it waits for a speech command through the mic. Alternatively, you can switch to Continuous mode in which the program listens continuously. There are no further functions. The degree of speech recognition is marginally acceptable.
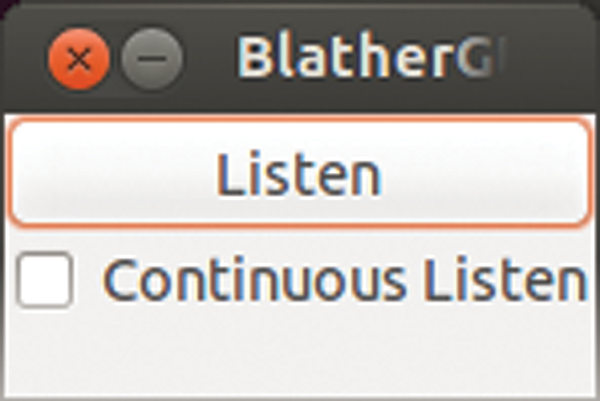 Figure 1: The Blather main window provides only starting and stopping for the voice control.
Unlike the other four programs, FreeSpeech, also written in Python, is generally a dictation device. After startup, it opens a simple text editor where all the words spoken into the mic are written. Special language commands allow subsequent editing. Thus, an editor clear command deletes all the text previously interpreted.
A window appearing after startup shows all the available commands (Figure 2). Here you can modify a command by double-clicking it. As of version 120, FreeSpeech provides the option to control other programs with a virtual keyboard. Click the Send keys button in the text editor and speak the key combination into the mic.
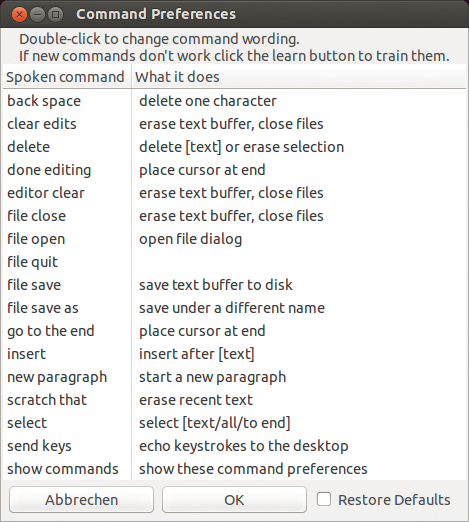 Figure 2: After startup, FreeSpeech shows all the commands you can use to manipulate the dictated text and even save it as a text file.
FreeSpeech interprets exclusively English words, despite that fact the degree of detection is not particularly good. In our case, the PocketSphinx background process interpreted a clearly spoken "Hello World" curiously as "An over To open" (Figure 3). The second try yielded "An adult wall."
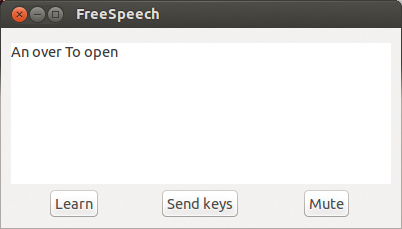 Figure 3: FreeSpeech interpreted a clearly spoken "Hello World" in a creative way.
According to the documentation, you can improve the recognition rate by correcting the failed text in the editor and clicking Learn . My test unfortunately produced a number of error messages in the process. Also, controlling other programs didn't work, and input ended up garbled in the editor.
To put FreeSpeech into operation, you need to integrate Python-Gtk2, Python-Xlib, Python-Simplejson, Python-Gstreamer, PocketSphinx, and Sphinxbase from the package manager. In Ubuntu, these are in the python-xlib , python-simplejson , python-gtk2 , python-gst0.10 , python-pocketsphinx , and gstreamer0.10-pocketsphinx packages. Again, if PocketSphinx isn't in your distribution's repository, follow the instructions in the "Three-Step Sphinx" box.
Download the PocketSphinx archive from the web [4] and unzip it on the hard drive. Open the Makefile from the CMU-Cam_Toolkit_v2/src subdirectory in the text editor and remove the hash mark (# ) at the beginning of the following line:
#BYTESWAP_FLAG = -DSLM_SWAP_BYTES
After saving, open a terminal, change to the CMU-Cam_Toolkit_v2/src subdirectory and execute make install . Then, copy the programs created in the folder to a directory included in the $PATH environment variable, such as /usr/local/bin .
Also from the web [5], download the FreeSpeech archive (pay attention to the ReleaseDate ). Unzip the archive on the hard drive and start the software using python freespeech.py in the created directory.
In contrast to the two previously mentioned programs, the Palaver speech recognition program, also written in Python, has no user interface. Instead, you start and stop the voice input using a freely selectable keyboard shortcut. Palaver then sends the spoken text to Google – naturally requiring a certain trust of the search engine giant (Figure 4).
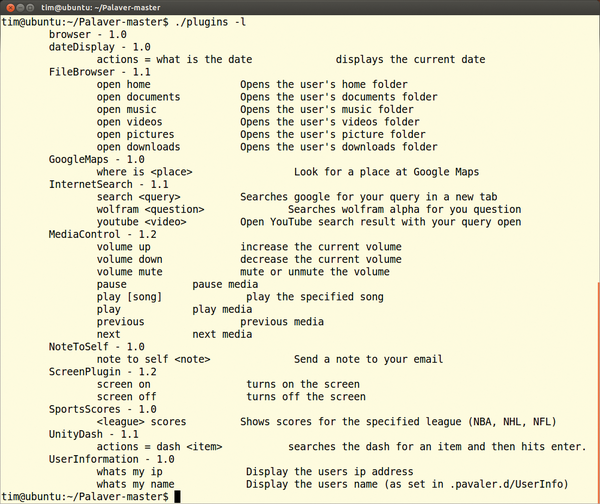 Figure 4: Palaver uses Google's services to interpret the spoken commands. This requires a certain trust, which many users have issues with.
If you voice the commands loudly and clearly, Palaver recognizes them far more readily than its competitors. You can also learn which English commands Palaver understands by using the ./plugin -l command in the program directory.
The "Open music" command, for example, opens the Music folder in the file manager. Each command comes from a plugin. For example, the FileBrowser plugin is responsible for the open command.
Additional plugins are in the catalog on the Palaver homepage [6]. Because the plugins are mainly simple Bash scripts, it's reasonably possible to add more commands to them.
To use Palaver, install the Sox, Python-Argparse, Wget, Espeak, Xvkbd, Xautomation, and Zenity packages via the package manager and be sure that the Notification-daemon, Notify-osd, or Notifyd are activated, depending on the desktop. In Ubuntu, you need the sox , python-argh , wget , espeak , xvkbd , and xautomation packages.
Next, download the current development version of Palaver from GitHub [7] using Download ZIP . Unzip the created archive on the hard drive and execute the ./setup command from the Palaver-master directory as the root user.
You can skip the personal details and enter the language. Integrate the Default Plugins using Install . Then, create a keyboard shortcut in the system settings that starts the hotkey script in the Palaver directory.
In Ubuntu, open the system settings, choose Keyboard | Shortcuts , mark Own Shortcuts , click the plus sign, enter a name (e.g., Palaver ) and enter the path to the hotkey script (e.g., /home/tim/Palaver-master/hotkey ). After Apply , click the Deactivated text and press the keyboard shortcut with which to activate the program in the future.
To install a subsequent plugin, execute the ./plugin -p <name> command in the Palaver directory, substituting the name of the plugin (e.g., FileBrowser ). If you want to write a plugin, take a look at the Doc folder where you can find an example to get you going.
A classic speech recognition program is Simon [8]. This software is written in C++ and uses the KDE library and either PocketSphinx or Julius. The latter is currently being maintained by developers in the Nagoya Institute of Technology in Japan [9].
Simon originally emerged out of a research project of the Federal Higher Technical Institute for Educating and Experimenting in Austria. In the meantime, the project has been taken over by the "Simon Listens" financing organization. The creators also founded an eponymous company offering services related to Simon [10].
After starting up Simon, a wizard opens to help you through the most important settings. It's assumed that you're already familiar with the Simon working model and terminology. The same is true for the main window (Figure 5), whose operating mode is not in the least intuitive. Beginners therefore can't get around studying the rather bulky manuals [11].
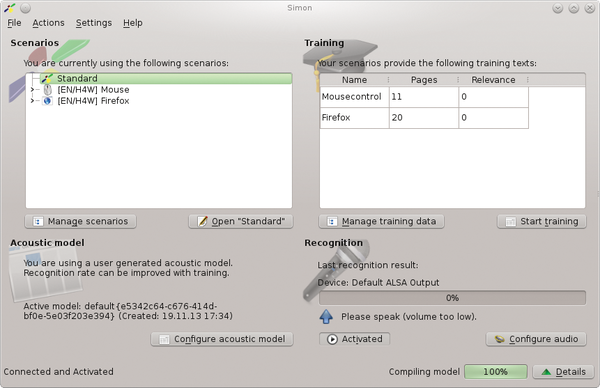 Figure 5: Simon's main window allows access to all the important settings, but it can be rather confusing.
The application collects all the voice commands for a specific task into a so-called "scenario." In this way, you can bundle all the Firefox commands together. Simon provides prepared scenarios for a few of the common use cases.
Furthermore, the software requires the data for the desired language model ahead of time. These you can get off the web. The model informs Simon about the characteristics of the language.
However, the models provided are based strictly on the usual language pronunciations. To improve recognition, the possibility exists of reading in all the commands again as part of a training session.
Simon operates as a client-server system. You can store a spoken language analysis on a server (Figure 6). This not only saves the local machine processing but also lets multiple clients rely on a central server. Simon can also listen on several microphones simultaneously or use a selected one – the first competing one is always used by default. Simon is also the only program that warns you of over- or under-amplification when recording.
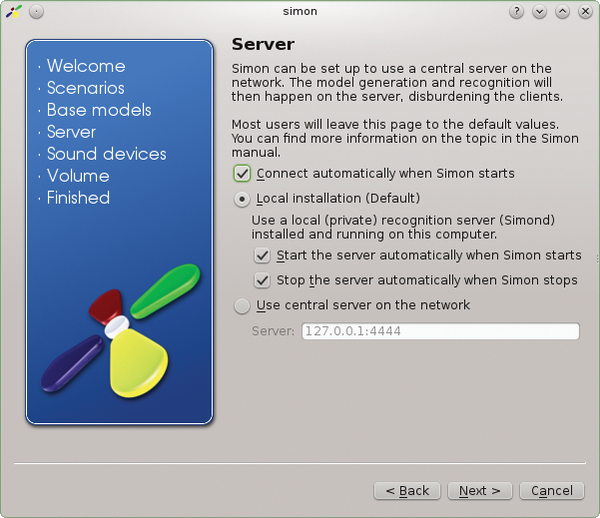 Figure 6: If Simon is running on a local machine, it starts its "simond" server component as a background task.
In our Ubuntu test, Simon could be loaded from the package manager but refused to start up. A openSUSE 13.1 port didn't behave much better. The program ignored all speech input without a comment and started throwing numerous error messages about. If you want to try Simon for yourself, first install C++ Compiler, Cmake, Git, and Gettext. For tools, you need the development packages for KDE, Qt6, Libattica, Phonon, and Zlib. The easier to install PocketSphinx can also be used as a back end.
If you prefer the Julius engine instead, subsequently install the Hidden Markov Model Toolkit (HTK), which you can get from the homepage after a free registration. Further installation instructions for Julius are in the Simon instructions.
That leaves just Simon itself. In openSUSE, the command on the first line in Listing 2 installs all the required packages as the root user. With the commands that follow, you download the current Simon version, interpret it, and install the voice controls.
Listing 2
Downloading and Installing Simon
# zypper in git-core gcc gettext-tools gettext-runtime libkde4-devel
  libqt4-sql-sqlite libqt4-multimedia libqt4-phonon-devel
  libattica-devel libattica0 zlib-devel kde-l10n-de qwt6-devel
# git clone git://anongit.kde.org/simon simonsource
# cd simonsource
# ./build.sh
The Vedics [12] program, also written in Python, integrates with the Gnome version 2 and version 3 desktop environment as well as Unity. Like Palaver, it comes without any user interface, but it understands only a selection of predefined English speech commands. To start Firewall, for example, you say "Run application," wait a few seconds, and then say "Firefox."
The program uses PocketSphinx as its engine, and the degree of recognition is not very good. Instead of "Move down," the program understood it as "Minimize window." It also took up a lot of processing on our test system, reacted to faint background noise, and crashed repeatedly.
To try Vedics, you can find it as a ready-made DEB package [13] on SourceForge. There, you can also download a PDF describing all the commands. You can download the tar archive, unzip it, and install the program using ./configure && make && sudo install . In any case, you should call up the program using vedics in the terminal. Only then can you determine what texts the program recognizes and whether it has crashed (Figure 7).
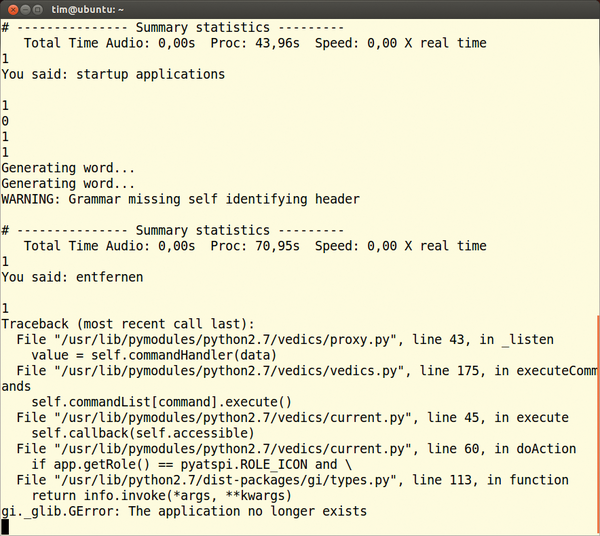 Figure 7: If you start Vedics from a terminal, you can tell immediately whether the program crashed. In such a case, use the kill command to delete any remnants in memory.
None of the candidates could compete with Siri or the commercial Windows programs. The language recognition turned out to be matter of luck, and the PocketSphinx engine [14] used by most programs lagged miles behind the commercial Dragon NaturallySpeaking.
Installation proved rocky because of all the required dependencies, and the operating concept was often cumbersome. Disabled users in particular would have a hard time getting the programs to work without assistance.
Palaver proved to have the best speech recognition capabilities, but it is inextricably linked with Google. The huge range of functions Simon provides can only be achieved with a massive amount of configuring – if you can get the program to work at all. Blather and FreeSpeech seem incomplete, and Vedics proved altogether useless in its current state. FreeSpeech at least allows input of English texts, as long as the extensive reworking isn't a bother.
Because the work on programs and engines is proceeding at its current slow rate, controlling the PC via speech may remain wishful thinking for Linux users for some time.
Infos