Use multiple distributions at the same time with Bedrock Linux
If you can install Arch Linux blindfolded, Bedrock Linux [1] could be a new challenge for you. The overhead can be roughly compared to setting up Linux from Scratch (LFS). As a reward, you will definitely learn a great deal, and Bedrock offers genuine added value compared to the above approaches: After the installation, you'll have a host system with multiple virtualized guests. However, nothing is virtualized at Bedrock; everything runs natively and transparently. The distribution is thus boldly venturing into new terrain.
In plain text, this means that Bedrock provides a structure in which you can install almost any number of different distributions and their respective applications. Bedrock, which is based on a relatively small, statically linked operating system core, thus combines the benefits of each installed distribution into a single system. For example, you can install the current version of Firefox from Fedora and also install a browser version compiled without D-Bus support using Gentoo and then run them at the same time.
Also the various package management tools of the individual distributions such as Apt, Yum, and Pacman are available in Bedrock. Additionally, you can install 32- and 64-bit systems in a single partition on 64-bit hardware. Also, different init systems like SysVinit, Upstart, Runit, or systemd will work peacefully side by side. All the installed applications, no matter where they come from, think they are running on their own native operating systems. Conveniently, Bedrock includes the home directory in all the installed distributions, so that you always work with identical data.
Documentation
Brought slowly and carefully to maturity by a small group of developers who set great store on stability of the basic system, Bedrock is developing steadily. At the time of testing, the 1.0beta2 "Nyla" version was available as a fresh download, but the developers are already working hard on a third beta.
If you are interested in Bedrock, you can get started on the Bedrock website by reading the introduction [2] and the FAQ [3]. The detailed documentation makes clear what Bedrock is and is not (Figure 1).
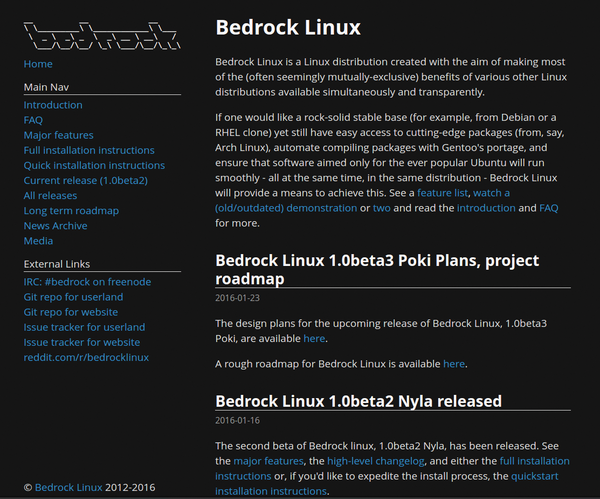 Figure 1: Reading the detailed documentation of Bedrock is a must.
Setting up Bedrock and installing and configuring multiple distributions can easily take a whole day. Therefore, you should think in advance about what you want to achieve with Bedrock. The distribution is suitable for learning by doing, or as a developer machine housing Debian and Ubuntu, for example, and it enormously facilitates comparisons of various package levels and debugging. Many other application scenarios besides these are also conceivable.
Bedrock does not offer any special security mechanisms that strictly separate the distributions – nothing is isolated or sandboxed. The installation of an Ubuntu package within the Ubuntu section of Bedrock could wreak havoc in the Debian installation. On the other hand, Bedrock would be a pointless endeavor if the same or different versions of two packages could co-exist easily in their native distributions.
If one of the distributions you are installing relies on SELinux, you might prefer to disable the feature [4]. Note that Bedrock will not make installing insecure packages from dubious sources more secure, unlike what you would assume with virtualization or containers.
Design Principle
The developers of Bedrock did not reinvent the wheel when constructing the distribution, but instead relied on age-old UNIX principles. Changed roots (chroots) [5] and bind mounts [6] provide a large part of the system's magic. Chroots slot in somewhere between containers and conventional virtualization. The biggest difference is that chroots are permeable, whereas containers tend to isolate. Using bind mounts, the system inside of the chroot then allows the launched applications to interact with files outside of the chroot environment.
The installation of the current version of Bedrock Linux usually works quite well, not least because of the detailed documentation. However, the process is likely to overwhelm less savvy users as it is entirely console-based. You build the base system inside an existing Linux installation from the Bedrock Git repository (Figure 2).
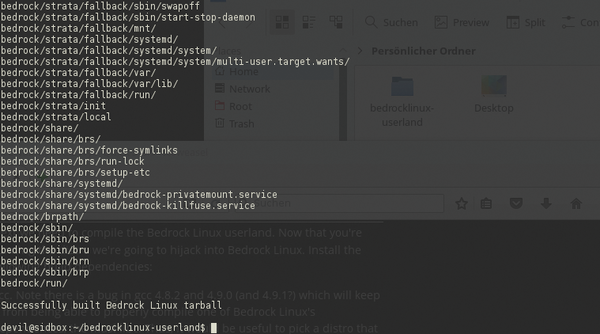 Figure 2: You build Bedrock from the project sources on the basis of an existing Linux installation.
All told, it took about four hours to set up Bedrock on a test system and install Debian 8, Fedora 22, and Void Linux. This process was followed by configuring and extending the installed basic systems. The space required by Bedrock will grow quickly depending on the number of installed distributions, but with the capacities and prices of today's hard drives, this is unlikely to be a worry.
Double Track
There are two ways of installing Bedrock as a basic framework: Quick Start and Full Installation. Both give you the same results, and the distinction between them is thus a little vague. Full Installation offers much more influence on the many settings that you can tweak in Linux; on the other hand, this approach also entails greater danger of doing something wrong. Until you feel more comfortable with Bedrock, you will probably want to opt for the Quick Start [7].
Before you start, you may want to polish your knowledge of Bedrock and its specific concepts and terms in the section Concepts, Theory, and Terminology [8]. The Stratum Setup instructions [9] provide instructions for the main distribution groups.
Piggyback
As I mentioned previously, you install Bedrock within a different Linux distribution – you are free to choose which one. It make sense to use a freshly installed system that you create on a large partition. Bedrock itself requires only a little space (Figure 3), but for each piggyback distribution you install, you will need between 10 and 15GB free space.
 Figure 3: Bedrock itself only takes up 70MB; however, this does not cover the host system or the additional distributions.
For the installation of Bedrock, you need to install any Linux toolchain tools missing on the host system; the Quick Install Guide goes into detail on this. Then, as a normal user, download the 500KB Bedrock code from GitHub and type make to create a Bedrock tarball of about 5MB.
Now unpack the tarball in the root directory of the host system. To do this, type su or sudo-s to assume administrative rights, cd / to the root directory, and use tar to unpack. Further commands ensure that all of your distributions find an appropriate infrastructure. This completes the installation of the basic Bedrock distribution, or stratum in the jargon of the Bedrock developers. This is a "kidnapped" basic installation that is now ready to house more distributions. There is already a fallback , or rescue system, that you create automatically when you install the system.
Installing Strata
It is now time to install the distributions within Bedrock. There are basically several ways to do this. You have the option of setting up the desired distribution on a USB stick and then copying the system from the stick to Bedrock. Another way would be to install the system in a virtual machine, then to mount the machine on the Bedrock system, and mirror it into the corresponding partition on the host. Both methods assume that you are able to install GRUB correctly in a chroot.
You might therefore prefer the easiest approach to get started, which is to build the distributions within Bedrock itself. The Quick Install documentation again points the way. For testing, we used debootstrap for Debian, rinse for Fedora, and the static installer for Void when setting up the basic systems. With this approach, you can install the basic systems of the three distributions in about an hour.
Bending
Next, you can move on the Configure section of the Quick Start page with the basic Bedrock configuration of the individual distributions. This part of the installation takes the most time. The aim is, among other things, to set up the symbolic links to the strata on the Bedrock filesystem (and the "kidnapped" distribution), create users and groups, and configure the boot loader.
You can apply most of the commands directly here, simply replacing the generic terms with the respective distribution name. To do this, you once again need to edit the /bedrock/etc/strata.conf file, where you define the basic distribution as the global stratum and as the rootfs [10]. A quick inspection of the contents of this file also sheds some light on the basic strategies of Bedrock (Figure 4).
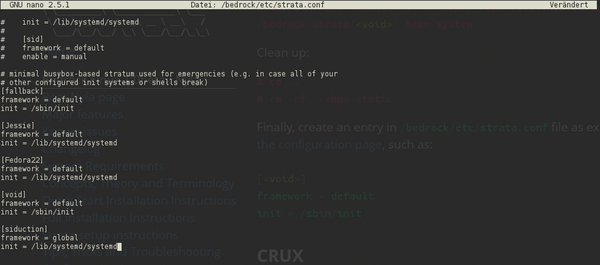 Figure 4: The strata.conf file defines the various guest systems.
The First Reboot
At the end of the configuration, you can reap the rewards of all this effort: After a reboot, the Bedrock menu appears and offers a selection of the installed strata (Figure 5). After starting the selected section, you are taken to its normal usual environment in which you can work similar to a conventional installation of this distribution. But, you are free to change at any time to the infrastructure of any other installed stratum at the command and to work with its package system.
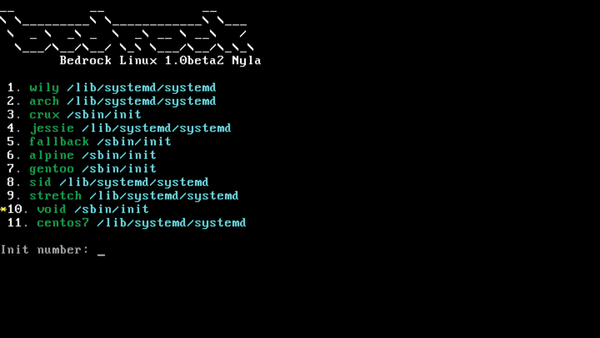 Figure 5: A system with 11 different distributions including different init systems, peacefully united on Bedrock.
This approach lets you install a newer, older or differently compiled version of a package, or call three different versions of VLC at the same time, to test which version supports a particular codec. Another use case could be that Debian "Jessie," which you may be working with, does not offer a particular package, but it is available in Fedora, which you also installed. In this case, you can just change to the terminal and install the missing package.
Understanding Commands
In practice, as a normal user, you change to the system of another installed distribution by typing the brc command. For example, typing brc Fedora22 takes you to the matching environment, where you can then call Yum, or DNF, to run the package manager. As an option, the brc command expects the name of the system as entered during the configuration in the strata.conf file. Then, brw lets you check whether the switch worked.
If an application exists multiple times in different distributions, you can also run an application directly by calling brc , as in brc Jessie firefox . To facilitate updates to several Debian-based distributions, you can apply commands to multiple subsystems. As shown in Listing 1, you can, for example, run apt-get dist-upgrade against all appropriate strata. A command synopsis on the website [11] discusses all the Bedrock-specific commands.
Listing 1
Running apt-get dist-upgrade
$ brl -c ,brw apt-get|grep "(direct)$"' sh -c ,apt-get update && apt-get dist-upgrade'
Hands-On
For the tests done within the scope of this article, my choice of distributions reflected the easiest possible sample applications to guide you to a working installation as simply as possible. If you have followed everything up to this point and are fascinated by the possibilities, you will find far more detailed information in the documentation on the website, and you might also discover other application scenarios.
In any case, a day spent installing Bedrock is not a waste of time – you learn a huge amount about the Linux system. And, it is interesting to see how the developers created a pretzel out of what is a actually a pretty straight filesystem to ensure the peaceful coexistence of different distributions with different init and package systems on a single partition.
Outlook
For the next version of Bedrock (1.0beta3 "Poki"), the plan is to automate the basic installation of various distributions. For example, running the brg get distro debian release jessie command would install Debian "Jessie" and integrate it with Bedrock, thereby removing the need for what are now mandatory configuration steps.
Additional Bedrock tools are planned for future releases, such as a package manager that bundles the relevant tools from individual strata under one roof [12]. This would let you, for example, update all the installed distributions at the same time with a single command or output a list showing which version of what package is installed in which distribution.
Advantages and Disadvantages
The only real disadvantage apparent on first sight of Bedrock is the very large space requirements once you start using a couple of additional distributions. Whether this actually is a disadvantage for you is something you must decide yourself. Would you install the distributions anyway on physical real hardware or in a virtual environment? If so, you can save space with Bedrock. Additionally, disk space is inexpensive today; even large SSDs have moved into affordable price regions over the past few years.
For Bedrock to be fun, you need to learn all you can about the underlying concepts by reading the documentation. If this is not something you enjoy doing, you will probably not enjoy the Bedrock experience. And, if you have questions, the active and friendly IRC channel can also provide helpful answers. You can reach this on the Freenode network under #bedrock .
The developers meet there daily under the paradigm pseudonym. If you write a personal message, you might experience a delay due to the time difference between Europe and the United States, but you will receive a reply. If you do not have an IRC client, please visit the website for a direct link to the web chat below External Links .
Infos
- Bedrock: http://bedrocklinux.org/index.html
- Introduction: http://bedrocklinux.org/introduction.html
- FAQ: http://bedrocklinux.org/faq.html
- Disabling SELinux: http://www.crypt.gen.nz/selinux/disable_selinux.html
- Chroot: https://en.wikipedia.org/wiki/Chroot
- Bind mount: http://unix.stackexchange.com/questions/198590/what-is-a-bind-mount
- Quick Start: http://bedrocklinux.org/1.0beta2/quickstart.html
- Concepts: http://bedrocklinux.org/1.0beta2/concepts.html
- Recipes: http://bedrocklinux.org/1.0beta2/strata.html
- Global Stratum: http://bedrocklinux.org/1.0beta2/concepts.html#global-stratum
- Commands: http://bedrocklinux.org/1.0beta2/commands.html
- Plans: http://bedrocklinux.org/1.0beta3/plans.html