
Krita 3.0 turns into a 2D animation tool
|
The Timeline Dock
The Timeline Dock is divided into two areas. The user will find a list of all drawing layers and a series of switches in the left column. Users will recognize the switches from the conventional layer dialog.
The only thing new here is the icon with the light bulb. It indicates a function by which the user can individually control onion skinning for individual layers. The element will only appear if the user has set up at least one key frame on the layer.
The user designs and administers the individual animation frames in the right-hand column of the Timeline dock. Each of the small squares represents a frame. Grayed-out boxes symbolize simple intermediate frames. Blue-colored fields on the other hand represent a key frame. The numbers above the timeline indicate the position for each of the frames. This information is also found in the Animation dock.
In order to create a key frame, the user should tap with the right mouse button on the corresponding square and select the New Frame option from the context menu. The Copy Frame option lets the user accept contents from the previous key frame. This function provides an easy method for creating simple placeholders during the design phase. If the user has activated the frame mode from the Animation dock, Krita will automatically create a key frame on the screen with each stroke of the brush. Alternatively, the user uses the mouse to select the desired box and presses on the back button.
Key frames are now relatively easy to administer via the mouse and the arrow keys. Using drag and drop, the user drags a key frame to the timeline. Holding the Ctrl key down at the same time will let the user copy the frame once the key is let loose at the target location. Holding the Alt key down lets the user move the selected frame together with all of the succeeding frames. Clicking on one of the boxes and then pulling the mouse with the left mouse button creates a multiple selection. Then, when the animation is played back, Krita will loop through only the frames that have been selected.
Importing and Exporting
Krita lets the user import animated sequences, however only in a simple form. Support for Sprite Sheets [7] has been put on the schedule of things that need work. Game developers will still have to exercise some patience.
In order to import frames, the user needs to have a series of sequentially numbered frames with the same reference name, so something like frame_00 , frame_01 , and frame_02 . Input is performed via File | Import animation frames… . The user opens a file manager in the dialog via Add images… and selects the frame series that will be imported (Figure 6). In the default setting, Krita imports the frames according to their numbering. The sequence can be reversed in the window sidebar.
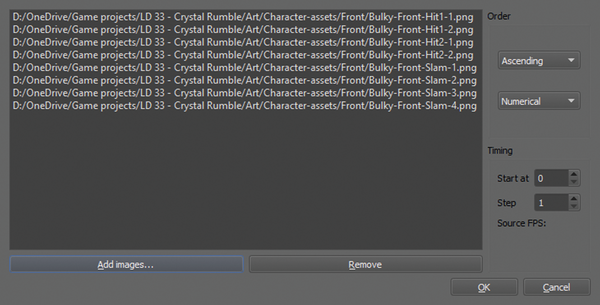 Figure 6: Krita 3.0 does not have import and export routines for animations. The program exports individual frames that the user then assembles into a video.
Krita 3.0 also still limits exports of animation to frame sequences. Therefore, the user will need external tools such as FFmpeg, Gimp, or ImageMagick in order to generate a final video file or an animated GIF frame. However, the Krita developers would like to implement an improved export routine in version 3.0.1. July 15 has been set as the release date.
In order to start an export, the user should enter Export… from the File menu. Then a file name and the desired format are entered into the file dialog. It is a good idea to select a lossless compressed format like PNG. Krita then generates a new image for each frame with the number as a suffix. The first frame that is exported corresponds to the start frame loaded onto the Animation dock. The last export corresponds to the end frame. In order to maintain a good overview of the process, the user should set up a new folder for every sequence that is exported.
« Previous 1 2 3 4 Next »
Buy this article as PDF
Pages: 6
(incl. VAT)
Buy Ubuntu User
US / Canada
UK / Australia
Related content
-
Graphics Application Krita Gets Photoshop Import
Following the release of KOffice 2.1, developers of the free office suite met last weekend in Norway's Oslo. Among them were the five strong team from Krita.
-
Overview of 2D animation programs

With the right tool and a bit of artistic talent, you can create two-dimensional cartoons, even without Flash. In this article, we present four animation programs and look at how well they perform in practice.
-
Editing videos with OpenShot

Bring your videos into the limelight and turn your recordings into minor works of art with the OpenShot editing tool.
-
Comparing seven current video editing programs

A correct choice in an editing program can save you a lot of headaches when working with video clips. We compare several applications to help you choose the tool that's right for you.
-
Comparing game development environments

GDevelop, Godot, and jMonkeyEngine simplify game programming with pertinent libraries, game engines, and developer tools. They make it possible for both beginners and advanced programmers to create nifty games with minimal effort.