Android virtualization with Genymotion and VirtualBox

Real Alternative

The alternative Genymotion Android emulator lets you test a self-developed app under real conditions.

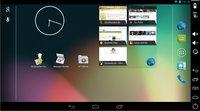
Being able to test their home-grown Android apps as comprehensively as possible would be a boon to every app developer. Hobby developers and beginners have a hard enough time keeping their Android systems, in all their myriad forms, in check. That's why Google has for some time provided in its Android SDK an emulator [1] for desktop PCs that captures various Android versions, CPU architectures, and displays (Figure 1).

Figure 1: The Android emulator can only be used for experimentation because of its sluggishness.

Not only developers but also users can benefit from a virtual Android on their system. Users are constantly looking for ways to capture an Android phone in a window. They can then safely test apps, play their favorite phone game, or find out which not readily available app can work on a tablet.

Lame Emulator

The official emulator, however, suffers from a series of limitations. For one thing, the emulator is sluggish – even if it's now possible to use the host CPU. For another, the emulator system never includes the Google Framework. Maps, Chrome and, of course, the Play Store aren't readily available from the emulated system, and subsequent app installations from Google Market aren't possible.

The AndroVM [2] open source project has long been available as an alternative. Based on work in Android x86 [3], which made Android runnable on conventional PC architectures, AndroVM ported Android to a virtual machine with help from VMware or VirtualBox. The virtualized Android was then already running quite a bit faster than the emulator from the SDK.

In the meantime, AndroVM has developed into a commercial project, known as Genymotion [4], which is still a cost-based version of the Android VM. Additional developer features are to be added later, which can be unlocked based on purchasing a license. For now, Genymotion remains available to any interested user.

Thanks to OpenGL support, the virtual Android in Genymotion runs practically as fast and smoothly on the PC as is expected on the smartphone itself. The prerequisites are a reasonable current PC and an OpenGL-capable graphics card with the associated drivers (see the "Genymotion: System Prerequisites" box).

Genymotion: System Prerequisites

  • OpenGL 2.0-capable graphics card
  • VT-x or AMD-V capable CPU with a minimum 2GHz
  • 2 GB RAM
  • 2 GB storage

Installing Genymotion

You can obtain the virtual Android as Genymotion after a free registration on the project homepage. Downloads are available for Windows, Mac OS X, and Linux. For Windows, there's also a version that includes VirtualBox [5]. For Linux, you need to install VirtualBox before starting Genymotion from the repository of the distro used.

To run Genymotion with Linux, the developers provide various downloads. A unified binary archive exists for 32-bit or 64-bit Ubuntu, Fedora, and Red Hat. The project has another archive for 64-bit Debian, for which you should also integrate the libpng3 package. As of yet, no DEB or RPM packages are available for installing Genymotion through the package manager. You can install the software with Arch Linux from the Arch User Repository (AUR) [6].

To install from binary packages, set the execute bit with chmod and call up the self-extracting archive. This unpacks all files in the genymotion directory into the current folder, where you'll also find the program executables.

Genymotion puts the downloaded OVA images and active virtual machines into the ~/.Genymotion folder. The tool links the active machines automatically with the VirtualBox installation so that the Android VMs are available in VirtualBox. At this point, you can make fundamental changes to the virtual machines. However, if you start an Android VM from VirtualBox, the Genymotion menus will be missing.

Setting Up Genymotion

Genymotion doesn't yet have any virtual machines when you first start it. Add opens the Create a new virtual device dialog where you can register your Genymotion account. The dialog provides a good selection of ready-made Android VMs that you can download to the system with Add (Figure 2).

Figure 2: Genymotion loads the various Android images from the web.

Genymotion provides machines with the Open Virtualization Archive (OVA) format supported in VirtualBox with Android 4.1 and later. Various types of devices with different resolutions are available. From version 2 on, Genymotion does not include Google Apps with their VMs for legal reasons, but this can be solved by grabbing the appropriate zip package from [7], dragging and dropping it onto a running virtual machine, and restarting emulator. Make sure the package corresponds to your version of Android!

To get to the virtualized system later over the Android Debug Bridge (adb for short), in Menu | Settings select Path to Android SDK [8]. At this point, don't give the full path to the binary adb (i.e., without the ending platform-tools\adb ), but only the path to the SDK itself.

Starting Android VM

If you have one more Android VMs on your hard disk, start the virtualized Android by clicking Play . Depending on your processing power – recommended are computers from the Intel core generation – the VMs start in a few moments.

As is usual with Android, initial setup and language selection are required. If you're using a VM with preinstalled Google Framework, the setup wizard asks for your Google account. It's best to create a separate Google account for your virtual test Androids.

You can now use your virtual Android as you would on the smartphone – the mouse replaces the index finger. To enter text, use the PC's keyboard, because Genymotion doesn't have a virtual one by default. In the VM setup, which you can get to using the little wrench icon or the Genymotion Configurator app, you can activate the virtual keyboard after the fact.

On the right, next to the Android screen, you can find the virtual buttons for volume and the on/off switch and buttons for "Menu," "Home," and "Back." Using the battery icon, you can fool the virtual Android into thinking that the power is running low. The GPS icon opens a window where you can provide the virtual smartphone with GPS coordinates. A searchable map can help choose a simulated location.

Power and Play Store

Developers and experts can definitely benefit from a virtual machine. Android users especially benefit from the Play Store integration in the Genymotion VMs (Figure 3) and the typical buttons in the user interface. In the virtual machine, you can experiment safely with unknown or suspicious apps without in any way compromising your smartphone.

Figure 3: Genymotion, unlike the Android SDK emulator, can run the Google Play Store.

Genymotion might not provide the option of doing snapshots of virtual machines in its user interface, but that doesn't present a problem with the VirtualBox back end, as with other desktop and server systems. You can back up a preconfigured machine and return to its previous state with just a few clicks. In VirtualBox itself, you also have option of archiving the VM with your demo app and passing it to other interested parties.

Conclusion

The virtual Android's performance naturally depends heavily on the host system, but the virtual Genymotion's Android emulator runs quite a bit faster and more smoothly than Google's Android emulator, even on older machines.

Developers will also find that the Genymotion API can access the Android VM interactively and thus emulate some features such as NFC through software. l