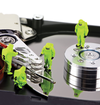
Data recovery with the TestDisk/PhotoRec duo

Slashdot it! Delicious Share on Facebook Tweet! Digg!

Live Image

After starting the live image of your choice, the next thing to do is to update TestDisk. The new version 7.1. has been around since April 2015, and it comes with new file types and a GUI for PhotoRec.

To begin the update process, enter su in the terminal to become the root user. No password is required here for a live medium. Then, start TestDisk and confirm that you would like to create a log file (Figure 1). Navigation in TestDisk is performed with the arrow keys. After confirming via the return key, TestDisk consults the BIOS or the UEFI to determine partition information and then displays a list of partitions. From this list, select the partition you want to repair and confirm the preset Proceed by pressing the return key. At this point, the program tries to recognize the partition type (Figure 2). The default entry is Intel , and this usually turns out to be correct (Figure 3). After entering another confirmation, TestDisk will display the tools it has to offer.

Figure 1: Having a log is always a good thing.
Figure 2: Be careful when you choose a hard drive.
Figure 3: Intel is usually the correct choice.

Writing a New Partition Table

Both the Analyze and Advanced entries are especially useful for damaged partition tables and deleted data (Figure 4). The other options can be used to change the drive geometry, write a new master boot record (MBR) and delete the partition table. See the box "What Is a Partition Table?" for more information.

What Is a Partition Table?

A partition table tracks the partitions that exist on all of the hard drives of the computer. Most of the time, partition tables are part of the master boot record (MBR). Recently, they are part of the GUID partition table (GPT). If the table is damaged, partitions and possibly entire hard drives are no longer visible to the filesystem.

Figure 4: Analysis is the first step.

When the user is confronted with a destroyed partition table, the first thing to do is perform an analysis. After confirming the preset setting, TestDisk immediately shows the analysis results for our case, which admittedly is a simple one. The program correctly recognizes the three partitions, although it does so twice for the first partition. If you now go to Quit and then to Advanced in the main menu, the next window indicates damage to the boot sector (Figure 5).

Figure 5: Discovering an invalid boot sector.

Using Boot opens options that include Rebuild BS . Choosing this option lets you rebuild the boot sector (Figure 6). After confirming your selection, the process will take a few moments to complete. Once the new boot sector has been created, you should confirm via Write that this will be written to the drive. After this, all three partitions should appear correctly (see Figure 7).

Figure 6: Writing a new boot sector.
Figure 7: A successful recovery. All of the three partitions are visible again.

Choosing Undelete lets you see all of the files with the correct names as noted above. This is because no data was actually deleted. Instead, the partitions had become invisible to the filesystem. Now you can return to the main menu via Quit , close the program, and start using the drive again after a reboot. The log can be helpful for any remaining questions. It is found as testdisk.log in the home directory.

Now I'll try using TestDisk to recover the data from the two partitions that I deleted with rm -rf . You should start the version without the GUI in a terminal. You will see the TestDisk dialogs and operating commands. In the first window, you should select the hard drive on which the data loss occurred. Then, confirm with Proceed and select the affected partition. Now you can immediately search under the pre-settings option or the file option for particular file types.

For example, if you have deleted JPGs, it is possible to filter out all of the more than 400 other data types and just look for JPG. Then, you should start the search, select the filesystem, and use the arrow keys to select another partition for recovering the data. Then, confirm with C . At this point, it is a good idea to have written down the path for this partition or the directory within the partition. This will prevent mistakes. After confirmation, PhotoRec begins the recovery process (Figure 8).

Figure 8: PhotoRec working on data recovery.

In this test, the program took some six hours to recover about 600GB, which included 10 different file types. Approximately 215,000 files were recovered, primarily JPG, PNG, PDF, and MP3 (Figure 9). The recovered files lie in numbered folders, which are labeled as recup_dir . The individual files now have cryptic file names, such as f12345678.jpg (Figure 10). This is common in this type of software, because it does not work at the level of the filesystem but rather one level further down.

Figure 9: All of the files have been found again.
Figure 10: Cryptic file names require a lot of extra work.

The graphical version QPhotoRec is not yet included in the Linux versions of TestDisk (Figure 11). Even if the less experienced user is not fazed by the prospect of operating PhotoRec in a terminal, it's good to know about the graphical interface for PhotoRec. It is available in version 1.0 of the current edition of the Parted Magic CD [7], now available only for a fee. For use with DEB and RPM distributions, it can be downloaded and installed. This is still just an early version. You probably shouldn't use it for actual data (Figure 11).

Figure 11: QPhotoRec is not quite yet ready for use.

Buy this article as PDF

Express-Checkout as PDF

Pages: 4

Price $0.99
(incl. VAT)

Buy Ubuntu User

SINGLE ISSUES
 
SUBSCRIPTIONS
 
TABLET & SMARTPHONE APPS
Get it on Google Play

US / Canada

Get it on Google Play

UK / Australia

Related content