Macro photography under Linux

Slashdot it! Delicious Share on Facebook Tweet! Digg!
Stanislav Bokser,123RF

Stanislav Bokser,123RF

Sharp Contrast

In macro photography, multiple images are merged together in order to generate a single picture. Under Linux, the enfuse tool performs this task. An alternative approach is to use GIMP, which lets you merge images manually, an approach that brings with it additional possibilities.

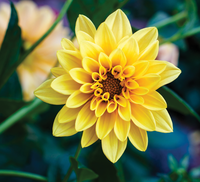
Macro photography is fascinating for many. This form of photography often presents details that would otherwise be overlooked, because it is able to put them into proper focus. However, it is impossible to make a sharp macro photo of an entire object because not all of its depth of field can be in focus at once. This is mostly due to restrictions imposed by the optical properties inherent in the combination of camera and lens. The larger the sensor and the focal distance, the smaller the depth of field will appear. Beyond a certain point, an open aperture will only capture a sharp region that is just a few millimeters in size. As an aside, these optical properties also explain why small compact cameras with small sensors and lenses frequently do a surprisingly good job of making photographs with a large depth of field. Even so, the quality of the sensors and lenses in these cameras is normally not as good as it is in larger cameras.

Strong stopping down improves depth of field (see the "Stopping Down" box). However, this approach only works for smaller regions of an image. Contemporary lenses have a maximum aperture size of 22. The f-number is equal to the ratio of the focal length to the entrance pupil. It used to be that lenses had larger f-numbers. This quickly led to flexion and in turn, to blurring. As a result, stopping down may not be a good solution. Problems that occur with this approach include:

Stopping Down

Stopping down is a technique by which the aperture of a camera's iris is reduced with the aim of increasing the depth of field (i.e. a longer range is in focus). The more you close the iris, the longer the focal length, but the less light reaches the image sensor of a digital camera or film of a film camera, resulting in darker pictures. You can compensate for this by lengthening the exposure time, that is, increasing the time the shutter is open, which is inconvenient without a tripod or for moving objects moving; or increasing the ISO on a digital camera; or using a film with higher speed with an analog camera.

  • The sharpness is limited to a relatively narrow region even with a large stop down.
  • The prolonged exposure times mean that even slow moving objects are often impossible to photograph.
  • Sharpness is not optimal with a small aperture opening, and it is often not possible to manually adjust for optimization.

Photographers have long been thinking about resolving the depth of field issues by combining multiple images with different focus points. This technique involves using sharp regions of images that are extracted from multiple, nearly identical images, all taken from the same angle with the most similar lighting possible in order to replace and cover regions that are out of focus. This approach assumes that you have the necessary images and that you also have the means for cutting small parts out of the images. Gimp's mask technology provides the tool you need for performing this type of digital image processing. The term "mask" refers to an image's regions that are displayed or hidden on a layer depending on the color used by the mask. The color white on a layer mask causes the mask to display the contents. Black makes them invisible. All of the regions from the various images will have to be put together as layers in order to generate a single image that is sharp through and through.

Modern RAW converters can help to detect the sharp regions of an image in digital negatives. Programs like darktable and RawTherapee have indicators for marking the regions that are in focus (Figure 1).

Figure 1: RawTherapee has a function that shows where an image's sharp regions can be found in a digital negative. Activate this function using the button shown by the yellow arrow.

Creating Images

There are some things to watch out for when making the images to ensure that you get good results. For one, you definitely will need a tripod when using focus stacking. The algorithms in the program are not good enough to make larger variations among the image parts invisible. Artifacts will remain behind and mar the results.

Many focus stacking images are generated in studios and laboratories (see the "Focus Stacking and Microscopy" box). This is because it is possible to impose controls over the conditions of these environments. Even the smallest movement of air can have an impact on an extremely lightweight object. Likewise issues can arise with changes in lighting. Consequently, a tripod proves itself very helpful for both camera and light sources. Therefore, it makes sense to place both camera and light sources on tripods and then make sure they don't interfere with each other. Camera manufacturers recommend that you switch off the image stabilizer for the camera when using a tripod.

Focus Stacking and Microscopy

The focus stacking method was originally developed for the field of microscopy, where the depth of field is ordinarily just a few micrometers in size. Given this limitation, it is practically impossible to generate a sharp image without using microscopy. It should not come as a surprise that some of the best instructions and information comes from related Internet sites. This site [1] provides a short and easily understood set of instructions, which are also based on enfuse and other tools.

You should use a monochromatic black background in order to achieve good contours and contrasts. You should not point the lighting directly at the background . A side light avoids hard shadows and garish colors; it also helps emphasize the three dimensional quality of an object. Moreover, it is a very good idea to set the exposure compensation for the aperture on at least minus one. This will darken the background accordingly without making the object itself dark.

A number of different factors influence the sharpness or depth of field. In order to generate suitable images, you should become familiar with the following:

  • Distance between lens and object
  • Focal length
  • Sensor size
  • F-number
  • ISO value

Currently, there are at least three methods for creating images for use with the focus stacking technique:

  • Manual focus : Focus on the closest part of the object, make an image, and then focus on a part of the image that is further away, etc. The advantage to this method is that you can find out right away where everything is and how sharp it is. The disadvantage is that it is rarely possible to generate sharp regions if you have failed to make an image that would be necessary for doing so. This would mean that the images you have made turn out to be useless.
  • Touchscreen : Lots of modern cameras have a touchscreen for setting focus and resolution. This simplifies the creation of images when compared to manual procedures. The touchscreen method also lowers the risk that you will overlook a region. A word of advice: Make more images than you need rather than too few. A possible downside here is that this method offers only limited precision when capturing regions.
  • Camera focus stacking functions : Better cameras today come with special focus stacking functions as part of their menu. These functions vary from manufacturer to manufacturer and according to the camera model. One camera from Olympus works as follows: You specify a focus step and the number of steps, both as absolute values. You then locate the closest point on the object. When releasing the exposure, the camera generates the number of images you have specified in the steps specified. The disadvantage to this camera is that it takes some experience to figure out suitable parameters. The advantage is that the camera is easy and fast to use.

It is a good idea to pay careful attention to the first image, which is the one that is closest to the lens. It is easy to make mistakes while creating this image, because it often contains non-visible regions in the foreground. A good habit here is to make additional images of this region for the stacking series. These prove helpful if you want to manually correct something (Figure 2).

Figure 2: Four layers and some edge definition were sufficient for this image. This is due to the relatively small lens in comparison to the size of the image.

Another piece of advice is that you should take lots of photographs. You should try out different variations instead of sticking with just one. The best thing to do is to make 12 photos, or better yet 20. It takes some time for you to develop an eye for the correct angle, lighting, etc. Practice makes perfect.

Combining Images

The partial images have to be aligned on top of one another as precisely as possible even if you want to process the images automatically or just very quickly. Alignment can prove to be more difficult than it might at first seem even if you have used a tripod when making the images. Figure 4 shows that the smallest of flaws stands out on a macro photo.

Figure 4: Even small flaws stand out on composites that have been generated automatically. Large flaws require manual corrections.

The task of alignment can often be accomplished using simple tools like the command-line program align_image_stack from the Hugin suite of programs. This program has a simple syntax:

align_image_stack <options> <input files>

The input files are read and analyzed and then written to the current directory as numbered output files, potentially with a prefix. In the process, the command considers movement and distortions existing between the input files, and then if possible, it generates the output files so that they are congruent.

Table 1 shows the most important options of the command.

Table 1

align_image_stack Options

Option Function
-o <output file> Merges the files into one high dynamic range (HDR) image. This option is NOT used for focus stacking.
-a <prefix> This option produces aligned image files. Typically the term "align" or something similar is used. If you specify a directory/ then align_image_stack will set this up and write the output files to the directory.
-v Verbose – triggers detailed messages, which can be important when problems arise.
-e Interprets the input files as "full frame fish eye" images when the images are made with a corresponding lens. The default interpretation is for rectilinear images.
-l Interprets the input files as linear.
-t <pixel> Sets an error limit in units of pixels for control points. Large deviations cause the program to ignore the command and look for other control points.
-c <number> Defines the number of control points that are used, by default this will be 8 .
-m Generates an optimized field of vision except for the first image shot. It is used during the focus stacking process and helps to even out small deviations in the images.
-d Distortion – lets you have minor deviations in rotated and distorted images for the purpose of accommodating lens distortions.
-i Smooths out minor movements of the input files.
--distortion Takes the information from the Lensfun database into account in order to remove distortions. This command is useful if the object you are using is included in this database.
--gpu Uses the GPU for computing. The command can deliver results much more quickly, or not, depending on your hardware.
--use-given-order By default the align_image_stack option arranges the input files according to the lighting stored in the Exifdata . Using this option, you can specify the sequence directly in the command line, a feature that is potentially helpful when dealing with alignment problems.

A practical tip: Except for the options -m , -a , and possibly also -v , you will not need any additional options to achieve sufficiently good alignment if you have good input files. However you should try out --gpu to see whether it increases the processing speed significantly. Should problems occur, it is a good idea to turn to -d (--distortion ), -i , and -t , as well as --use-given-order .

A typical sample example in the directory for the input files looks as follows.

align_image_stack -v -m -a align *jpg

This generates the aligned files align0000.tif , align0001.tif , align0002.tif , etc. The output format TIFF is a good choice here. This type of file supports an alpha channel that in turn uses enfuse if it is available. If you use this command call frequently, then you should define an alias:

alias ALIGN='align_image_stack -v -m -a align'

If align_image_stack does not produce good results, then you still have the possibility of putting the image parts in place manually. This is not a problem with Gimp. First, you should load one partial image and then the next one as a new layer. This is done using Open as Layers … in the File menu. You should now change the layer Mode of the uppermost layer to Extract grain . Image parts in the layers that are identical will then appear in gray (Figure 5).

Figure 5: Gimp lets you align layers manually. You should use the Extract grain layer mode for the top layer .

You can use the dragging tool and the cursor buttons to put the upper layer in place as best you can, as shown in Figure 5. If the layers lay exactly on top of one another, then the contours will disappear into a uniform gray tone. However, it is often not possible to place the layers perfectly. If you have this problem, place the images as nearly as possible to the regions where you want to use sharp regions. Then you should change the layer mode back to Normal and right-click on the topmost layer and add just an alpha channel with Add alpha channel from the pop-up menu. Then erase the image regions that are unsuitable or not sharp. Figure 6 shows the result.

Figure 6: The result of a focus stacking series that underwent a moderate amount of manual processing.

Buy this article as PDF

Express-Checkout as PDF

Pages: 8

Price $0.99
(incl. VAT)

Buy Ubuntu User

SINGLE ISSUES
 
SUBSCRIPTIONS
 
TABLET & SMARTPHONE APPS
Get it on Google Play

US / Canada

Get it on Google Play

UK / Australia

Related content